Duck Bánh Mì

Crispy, smoked mallard makes fantastic version of this Vietnamese inspired sandwich.
The bánh mì is everything good about a sandwich. Lots of layered flavor components, all working together in a self-contained torpedo of goodness. It’s a Vietnamese mainstay, born out the French culinary influence imparted to Vietnam during the colonization of the region, then known as Indo-China. A french baguette, filled with roasted meat, pate’, pickled vegetables, and fresh herbs is standard fair, often using pork. This version uses a fat mallard, thats been smoked on the pellet grill until medium rare. I glazed the duck with some orange marmalade during the later portion of cooking and ended up freezing the prepared bird whole, when I had to suddenly take a trip out of town. A few weeks later I pulled the cooked duck from the freezer and made a batch of báhn mì sandwiches for my family.
The is an easy to put together recipe, the only work comes from making some quick pickled veggies with carrot, daikon, and cucumber. Otherwise, just quickly crisp the duck skin, warm the meat through and assemble the ingredients. I found that I was able to get 4 substantial sandwiches from one duck and still have a carcass to throw in the stock pot.
Baguettes are traditional, but they’re hard to come by in my neighborhood. There is however, no shortage of panaderias, so I used bollilo rolls. One more local addition to a sandwich with a complicated history.
Ingredients
whole smoked duck
baguette or hoagie rolls
julienned english cucumber
julienned carrot
julienned daikon radish
fresh cilantro
good mayo
sriracha sauce
hoison sauce
thinly sliced fresh jalapeño
good rice vinegar
sugar
salt
First, fill a mason jar with equal parts julienned carrot, daikon radish and english cucumber. I use english cucumbers because that have a higher “meat” to seed ratio. I then remove the pulpy center and only use the firmest part of the cucumber. This will yield a crunchier finished pickle.
Next add half a cup of warm water, a quarter cup good quality rice wine vinegar, sugar and salt to the jar. make sure vegetables are covered with liquid. Put a lid on the jar and gently shake until the salt and sugar has dissolved. Place the jar in the fridge and let it rest for at least an hour. This is a quick pickle, but the slightly “funky” aroma of the daikon will give it a bit of a longer fermented flavor.
Separate the duck skin from the meat and cut both into very thin strips. Crisp the skin in a cast iron pan on medium high heat. Once the skin has browned and crisped nicely, kill the heat and throw the meat into the pan. Gently stir to incorporate the two together, as well as the produced, rendered fat. This will warm the meat, without pushing it past the palatable stage of doneness.
Now its time to assemble your sandwich. Split your baguette (or in this case bollilo roll) and spread mayo on the bottom half. Next pile up a generous portion of duck, topped with hoison sauce. After that comes the pickled veggies, fresh cilantro and depending on you tolerance for heat, jalapeño and sriracha.
That’s it. You’ve got a fatty, vinegary, sweet, spicy, crunchy, bad ass sandwich to enjoy. The pickles will keep for weeks in the fridge and get better with a few days of maturation. Once you’ve got them on hand use them to make other iterations of báhn mì as you see fit.
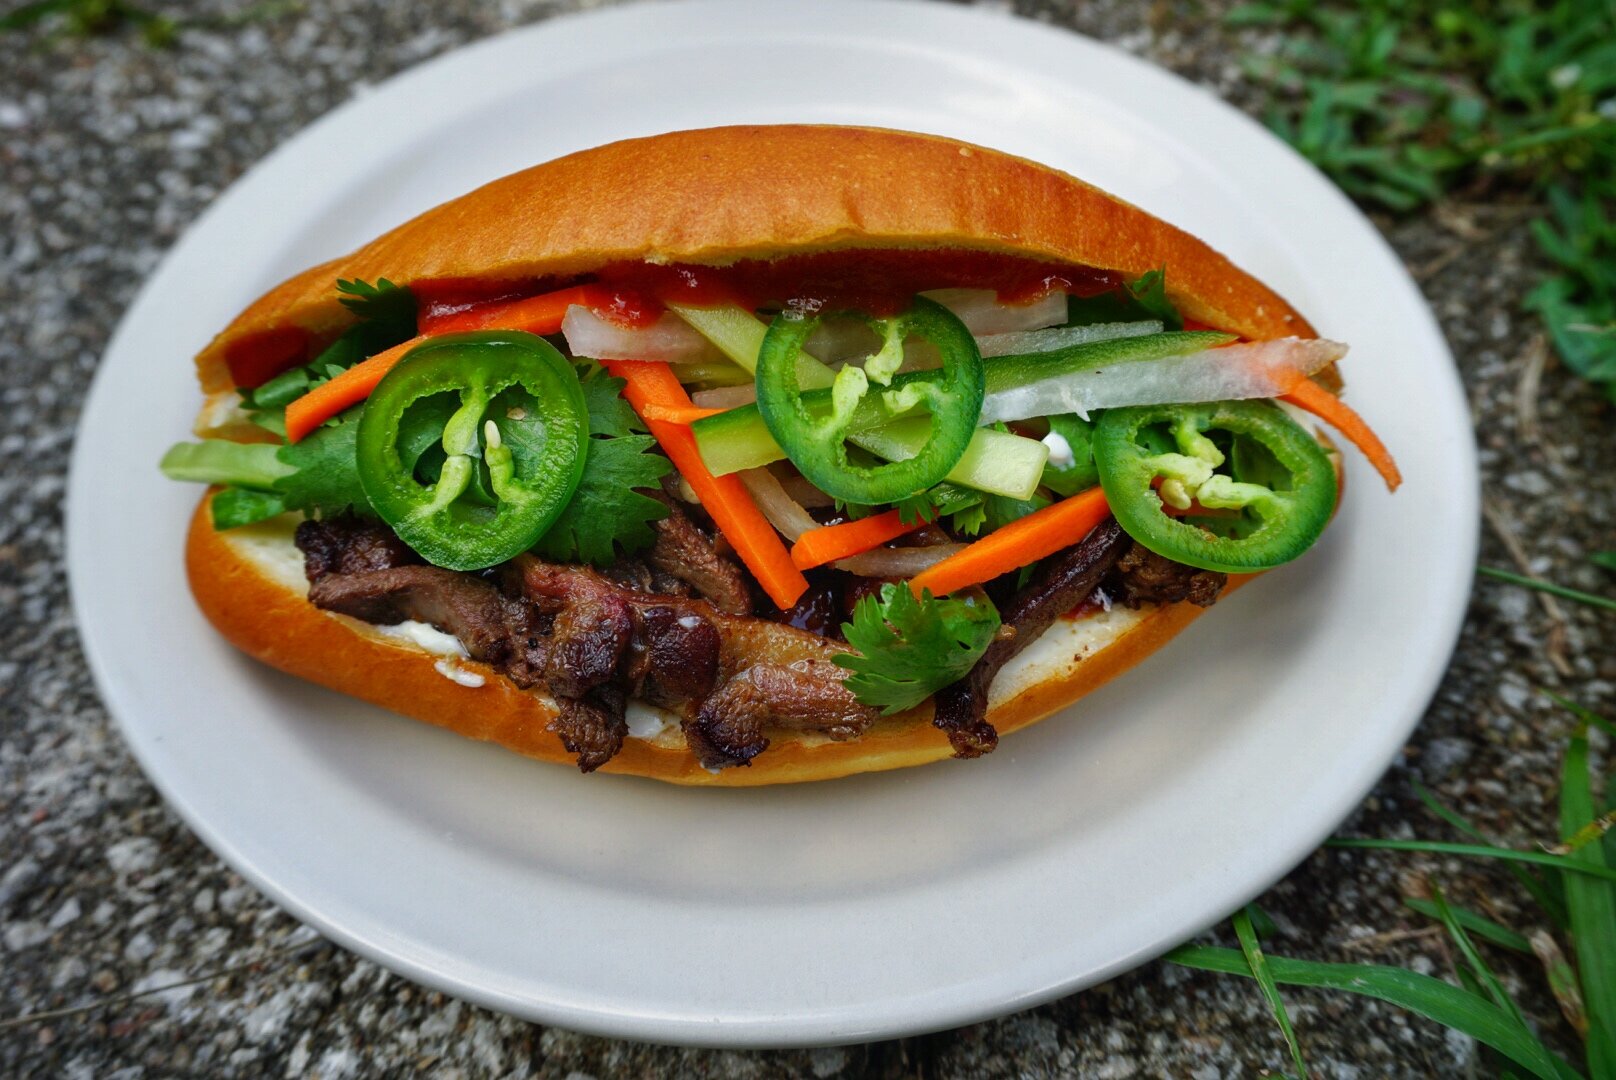
Duck báhn mì makes for an easy to put together lunch.